Building a floating deck is an exciting and practical way to expand your outdoor living space. In this second part of the series, we’ll guide you through framing and waterproofing your floating deck, ensuring it’s sturdy, durable, and ready to withstand the elements. Whether you’re creating a cozy patio area or a foundation for outdoor gatherings, this step-by-step guide will help you tackle the project confidently.
Understanding the Basics of a Floating Deck
What Is a Floating Deck?
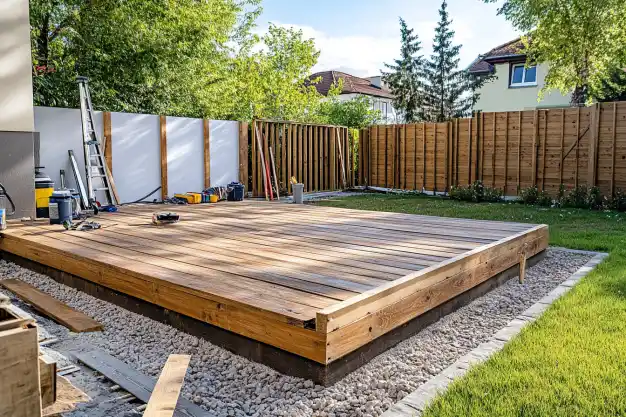
A floating deck, often called a freestanding deck, is not attached to a building or structure. It “floats” above the ground, supported by concrete deck blocks. These decks are ideal for uneven terrains or as a temporary solution for renters who can’t make permanent changes.
Advantages of Floating Decks Over Traditional Decks
- Easy Installation: No need for deep digging or concrete footings.
- Versatility: Suitable for various spaces, including sloped or uneven grounds.
- Cost-Effective: Requires fewer materials and less labor.
- Eco-Friendly: Minimally invasive to the surrounding environment.

Tools and Materials Needed
Essential Equipment
- Circular saw
- Power drill
- Level
- Tape measure
- Safety goggles
Materials
- Pressure-treated lumber (ground contact grade)
- Concrete deck blocks
- Joist hangers and galvanized screws
- Decking boards
- Waterproofing membrane
Step-by-Step Instructions to Build the Frame
1️⃣ Prepare the Deck Area
Start by selecting the right location for your deck. Clear the area of debris, rocks, or plants, and ensure the ground is level. Mark the dimensions of your deck with stakes and string.
2️⃣ Set the Concrete Blocks
Place the concrete deck blocks according to your layout, ensuring they are evenly spaced to provide adequate support. Use a level to ensure the blocks are aligned properly.
3️⃣ Build the Outer Frame
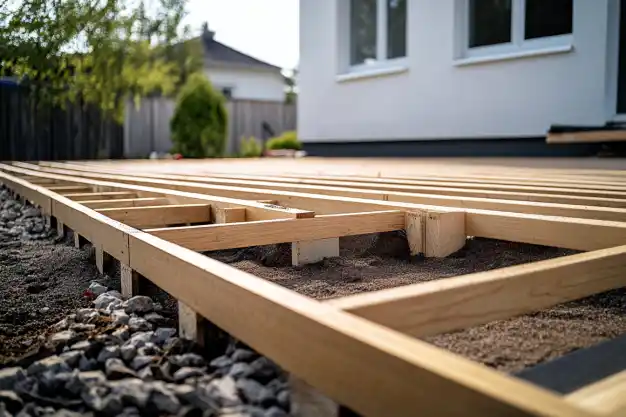
Construct the outer frame using ground contact lumber. Secure the corners with galvanized screws or brackets to create a strong rectangular structure. This frame acts as the foundation for your joists.
4️⃣ Elevate and Level the Frame
Lift the frame onto the concrete blocks and adjust it to ensure it’s level. Use shims if necessary to correct uneven areas. A stable frame is crucial for the longevity of your deck.
5️⃣ Space Out and Install Joists
Attach joists inside the frame using joist hangers. Space the joists evenly, typically 16 inches apart, to provide structural integrity and prevent sagging. Secure each joist with screws for added stability.
Additional Considerations for Long-Term Durability
When building a floating deck, long-term durability should be a top priority. While waterproofing protects the deck from moisture, regular inspections are equally important to identify potential wear and tear early. Check for loose screws, warped boards, or any signs of water damage, especially after heavy rains. Reapplying a fresh layer of stain or sealant every few years will keep your deck looking pristine and shielded from the elements.
Furthermore, integrating landscaping around your deck can enhance its aesthetic appeal while adding functionality. Consider planting drought-tolerant shrubs or ground cover near the deck to soften its edges and create a seamless blend with your outdoor space. This not only improves the overall look of your yard but also prevents soil erosion around the structure.
Enhancing Your Deck with Accessories
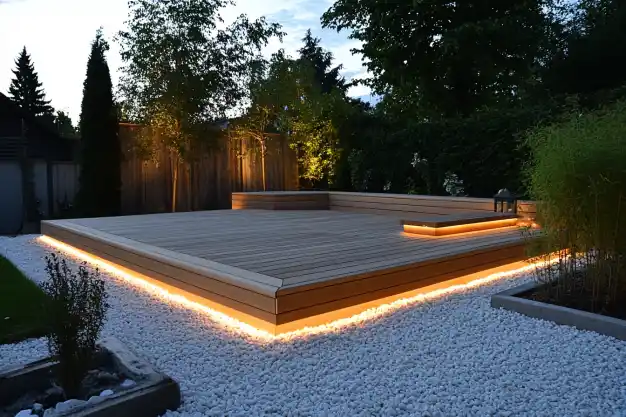
Once your floating deck is complete, accessories can help personalize the space and make it more inviting. Add outdoor furniture like weather-resistant chairs, a dining table, or even a cozy sectional for entertaining guests. For a touch of ambiance, install solar-powered lights along the deck’s perimeter or string lights above to create a warm and welcoming atmosphere.
Additionally, consider placing potted plants or hanging planters around the deck to bring in vibrant colors and textures. This is an easy way to add greenery while complementing your deck’s design. Whether it’s for a quiet morning coffee or an evening barbecue with friends, these additions will make your floating deck the centerpiece of your outdoor retreat.
Waterproofing Your Floating Deck
Why Waterproofing Is Essential
Waterproofing protects your deck from moisture damage, rot, and mold, significantly extending its lifespan. Without proper waterproofing, even pressure-treated wood can deteriorate over time.
Applying a Waterproof Membrane
- Clean the Surface: Ensure the wood is dry and free from debris.
- Measure and Cut: Cut the waterproof membrane to fit over the joists.
- Apply Adhesive: Attach the membrane securely, ensuring no gaps or bubbles.
- Seal the Edges: Use tape or an additional sealant to prevent water infiltration.
Additional Tips for Water Resistance
- Ensure proper drainage by slightly sloping the deck away from the house.
- Seal any gaps between the decking boards to prevent water pooling.

Considerations for Building Over Concrete
Adapting Frame Design for Concrete Surfaces
If your deck is placed over a concrete slab, adjust the frame design to ensure it’s stable and well-supported. Use rubber pads between the deck blocks and the concrete to prevent slipping.
Using Rubber Pads or Spacers
Rubber pads or spacers help protect the deck frame from moisture and provide a cushioning effect, which reduces wear on the materials.
Tips for Finishing Your Deck
Installing Deck Boards
Align the decking boards perpendicular to the joists for maximum strength. Leave small gaps between boards to allow for natural expansion and drainage. Secure the boards with screws or hidden fasteners for a clean finish.
Staining and Sealing for Longevity
Choose a high-quality deck stain or sealant to protect the wood from UV damage and moisture. Apply the stain evenly with a brush or roller and allow it to dry completely before using the deck.
Common Challenges and Solutions
Leveling Uneven Ground
Uneven ground can cause instability. Address this issue by using shims or additional leveling tools during the setup process.
Securing the Frame Against Shifting
To prevent movement, ensure the frame is tightly anchored to the deck blocks and the ground is compacted beneath them.
Preventing Moisture Build-Up
Regularly check for water pooling and clear any debris that could block drainage. Proper waterproofing measures will minimize this risk.
FAQs About Floating Decks
How much weight can a floating deck support?
A properly constructed floating deck can support around 50 pounds per square foot, depending on the materials used and the spacing of the joists.
Do I need a permit for a floating deck?
Permit requirements vary by location. Check with your local building authority to determine if a permit is needed for your project.
Can I install a floating deck on sloped terrain?
Yes, but it requires additional leveling and support adjustments. Use adjustable deck blocks or a stepped frame design for best results.
Related Posts
Explore more helpful resources for your DIY projects:
Conclusion
Building a floating deck is an achievable and rewarding DIY project. By following this guide, you’ll have a solid frame and effective waterproofing to ensure your deck stands the test of time. Embrace the opportunity to create a functional and beautiful outdoor space that enhances your home and provides countless moments of enjoyment. Start your project today and transform your backyard with confidence!

