
Why Build Your Own Tall Outdoor Planter Boxes?
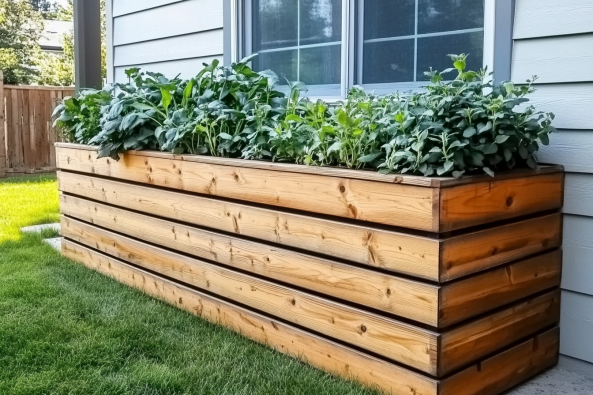
Tall outdoor planter boxes are a great way to enhance your garden space. Whether you’re growing flowers, vegetables, or small shrubs, building your own planters gives you control over size, materials, and style.
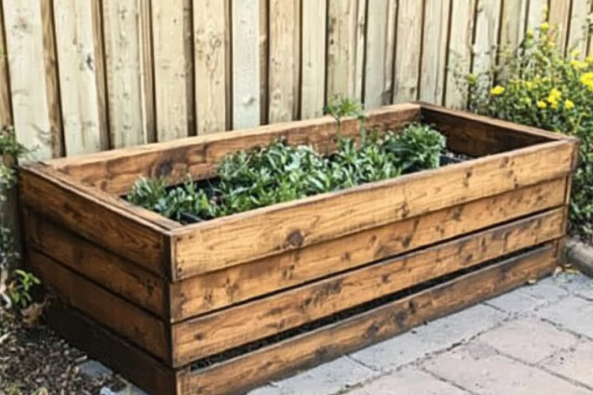
Benefits of Raised Planter Boxes
- Better Drainage: Elevated planters improve drainage and prevent waterlogged roots.
- Ergonomic Gardening: Reduces the need for bending, making gardening easier on your back.
- Customizable Design: Tailor the size, shape, and finish to match your outdoor aesthetic.
Choosing the Right Location for Your Planters
- Sunlight Exposure: Position planters in areas that receive adequate sunlight for your chosen plants.
- Wind Protection: Place them against a wall or near fences to shield plants from strong winds.
- Accessibility: Ensure easy access for watering, harvesting, and maintenance.
Materials and Tools Needed
Lumber Shopping List
- Cedar, Redwood, or Pressure-Treated Lumber (Weather-resistant and durable)
- Plywood or Deck Boards (For the planter box bottom)
- Wood Screws or Nails (Rust-resistant for outdoor use)
Essential Tools for Building
- Saw (Circular or hand saw for cutting lumber)
- Drill & Screws (For securing the frame and side panels)
- Measuring Tape & Pencil (For accurate measurements)
Additional Supplies for Durability
- Landscape Fabric or Plastic Liner (To protect wood from soil moisture)
- Sandpaper or Electric Sander (For smooth edges and a professional finish)
- Exterior Wood Stain or Paint (To weatherproof and enhance the look)
Step-by-Step Guide to Building Tall Outdoor Planter Boxes
Step 1 – Planning and Measuring
How Tall Should Your Planter Box Be?
- Standard Height: 24-36 inches tall for easy access.
- Custom Heights: Adjust based on the plants you plan to grow.
Step 2 – Cutting the Frame and Side Panels
Best Practices for Cutting Wood Accurately
- Measure Twice, Cut Once: Double-check dimensions before cutting.
- Use a Guide: Clamp a straightedge to your wood for precise cuts.
Step 3 – Assembling the Frame
How to Secure the Corners for Stability
- Use Corner Brackets: Provides additional support for long-lasting durability.
- Pre-Drill Holes: Reduces wood splitting when inserting screws.
Step 4 – Attaching Side Slats and Bottom Supports
Ensuring Proper Drainage and Ventilation
- Drill Drainage Holes: Helps prevent excess water buildup.
- Elevate the Bottom: Use slats or plywood with gaps for airflow.
Step 5 – Sanding, Staining, and Weatherproofing
Best Wood Finishes for Outdoor Planter Boxes
- Waterproof Sealer: Protects against rot and mold.
- UV-Resistant Stain: Prevents fading from sunlight.
Step 6 – Adding a Liner and Soil Preparation
Using Landscape Fabric, Chicken Wire, or Plastic
- Landscape Fabric: Prevents soil from washing out while allowing drainage.
- Chicken Wire: Keeps pests like moles and rodents away from roots.
Best Plants for Tall Outdoor Planter Boxes
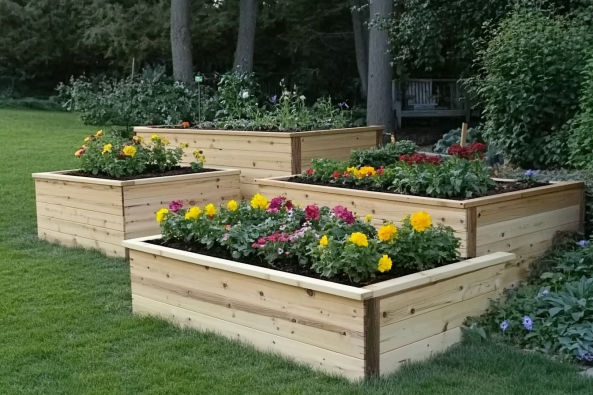
Flowers and Ornamentals for Visual Appeal
- Marigolds, Petunias, and Begonias: Provide vibrant color.
- Ferns and Hostas: Great for shaded areas.
Herbs and Vegetables for Functional Gardening
- Basil, Rosemary, and Mint: Thrive in contained spaces.
- Cherry Tomatoes, Lettuce, and Peppers: Ideal for small-space edible gardens.
Creative Design Ideas for Your DIY Planters
Painting and Customizing Your Planter Boxes
- Two-Tone Designs: Use a combination of stain and paint for contrast.
- Stencil Patterns: Personalize with floral or geometric designs.
Adding Trellises for Vertical Growing
- Ideal for Climbing Plants: Cucumbers, beans, and ivy thrive with trellises.
- Simple DIY Trellis Ideas: Attach a wire grid or wooden lattice to the back.
Using Bricks or Stones for a Decorative Base
- Elevates the Planter: Improves drainage and adds visual interest.
- Stone Borders: Creates a rustic and polished look.
Common Mistakes to Avoid When Building Planter Boxes
Choosing the Wrong Type of Wood
- Avoid Softwoods: Pine and fir may warp over time.
- Opt for Weather-Resistant Lumber: Cedar and redwood last longer outdoors.
Not Allowing Proper Drainage
- Add Drainage Holes: Prevents root rot and overwatering.
- Use a Permeable Liner: Keeps soil from escaping while allowing excess water to drain.
Overfilling with Soil or Heavy Materials
- Use Lightweight Potting Mix: Retains moisture without compacting.
- Avoid Overloading: Too much soil can cause structural strain on the box.
FAQs About DIY Tall Outdoor Planter Boxes
How Long Do Wooden Planter Boxes Last?
- With Proper Maintenance: 5-10 years if sealed and weatherproofed.
- Without Treatment: May degrade within a few seasons.
Can I Build Planters Without Power Tools?
- Yes! Use pre-cut lumber and a screwdriver for assembly.
- Hand Saws & Hammer: Alternative tools if you prefer a traditional approach.
How Can I Make My Planter Boxes More Mobile?
- Attach Caster Wheels: Makes it easy to move planters around.
- Use Lightweight Soil Mix: Reduces overall weight for portability.
Share Your DIY Planter Box Projects!
Comment Below with Your Favorite Planter Box Ideas
- Share your custom designs and what plants you’re growing!
Tag Us on Social Media for a Feature
- Use #DIYPlanterBox for a chance to be featured on our site!
Related Articles
- Build a DIY Planter Box with Only 2 Tools (Free Plan)
- DIY Raised Garden Bed Ideas for Small Spaces
- Tall Outdoor Planter Box Inspiration
By following this DIY tall outdoor planter box guide, you can enhance your garden space with custom-built, durable, and stylish planters that fit your home’s unique aesthetic!